Direct delivery
Gmail is set up for direct delivery. Direct delivery sends all messages for people in your domain to their Gmail inbox. Direct delivery setup is described in Activate Gmail for Google Workspace.
Dual delivery
If you want to send your organization's email to two or more inboxes, set up dual delivery. With dual delivery, messages are delivered to a Gmail inbox and to your legacy, non-Gmail system For example, you might want to deliver email to Gmail and to Microsoft Exchange or to an archiving server.
Incoming mail is delivered to the primary mail server first. The primary server is the mail server identified in the MX records for your public domain. The primary server delivers each message to the inboxes associated with it and then forwards all messages to a secondary mail server. The secondary server delivers the messages to the secondary server inboxes.
With dual delivery, the primary server can be either Gmail or your legacy mail server. We recommend you always use Gmail as the primary server.
Step 1: Add your legacy server in the Admin console
Before you can set up dual delivery, you must add your non-Gmail server with the Add Route setting.
Step 2: Set up dual delivery
After you add the legacy server with the Add Route setting, you’re ready to set up dual delivery. We recommend using Gmail as your primary server.
Option 1: Dual delivery—Gmail as a primary server (recommended)
- In the Admin console, go to Main menu > Apps > Google Workspace > Gmail > Routing.
- To apply the setting to everyone, leave the top organizational unit selected. Otherwise, select a child organizational unit or a configuration group.
- On the Routing tab, click Configure or Add Another Rule.
- In the Add setting box, take these steps:
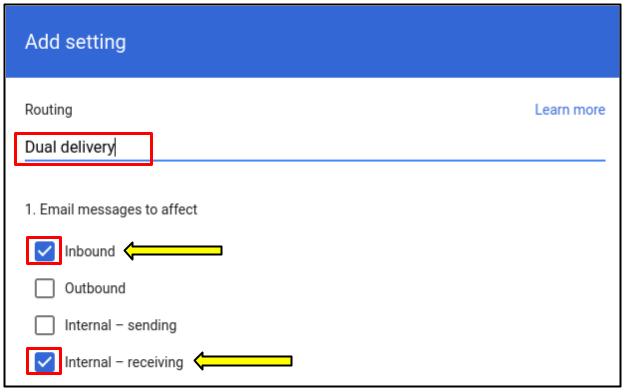
- Routing: Enter a descriptive name for the address map. If you don't enter a name, you can't save your setting.
- Email messages to affect: Select Inbound, or Internal-receiving, or both:
- Inbound—Incoming messages from external senders are delivered to both the primary and secondary servers.
- Internal-receiving—Incoming messages from internal senders are delivered to both the primary and secondary servers.
- For the above type of messages, do the following: Click the dropdown and Select Modify message.
- Modify message: Select these options to set up dual delivery for affected messages:
- Scroll to Also Deliver to, and check the Add more recipients box. The Recipients table is shown.
- Beneath the Recipients table, click Add. The Add setting box appears.
- At the top of the Add setting box, click the dropdown and select Advanced.
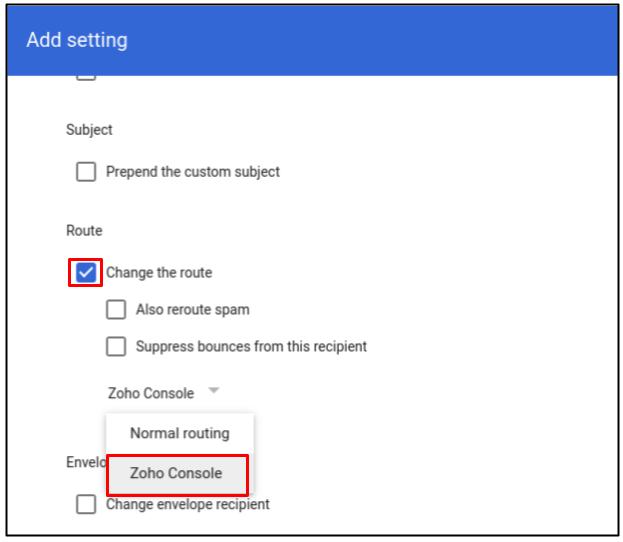
- Beneath Route, check the Change the route box.
- Beneath the Change the route, click the dropdown and select the server you added in Step 1: Add your legacy server in the Admin console.
- (Optional) Leave the 2 boxes beneath Spam and delivery options checked:
- Do not deliver spam to this recipient
- Suppress bounces from this recipient
- At the bottom of the Add setting box click Save.
- The new route appears in the Recipients table.
- At the bottom of the Add setting box, click Save.
- Scroll to Also Deliver to, and check the Add more recipients box. The Recipients table is shown.
- At the bottom, click Save.


Option 2: Dual delivery—Legacy server as primary server
You may want to use your legacy server as the primary server for dual delivery. For example, to pilot Gmail with a few users during your trial period. Otherwise, we recommend Option 1: Dual delivery—Gmail as primary server.
Keep the following in mind when using your legacy server as the primary server:
- Don't update your MX records to Google.
- To set up server-based forwarding, you’ll need to sign into your domain provider. Make sure you have your username and password for your domain provider.
- Google doesn’t support issues with third-party servers. If you need help with setting up your legacy server for dual delivery, check the help center for your server or contact the server vendor.
To use your legacy server as the primary server, use one of these methods:
- Set up server-based forwarding from your legacy server to Google (recommended).
- If your legacy server doesn’t support server-based forwarding, set up the server to forward messages to test domain aliases.
Split delivery
As an administrator, you can customize how email is routed and stored to meet your organization's requirements.
Gmail split delivery lets you deliver incoming email messages to 2 different email systems in your domain, based on the recipients you specify. For example, use split delivery when some people in your organization use Gmail and other people use a different email system.
Step 1: Add your non-Gmail server in the Admin console
Before you can set up split delivery, you must add your non-Gmail server with the Add Route setting.
Step 2: Set up split delivery
- In the Admin console, go to Main menu > Apps > Google Workspace > Gmail > Routing.
- On the Routing tab, scroll to Routing.
- Click Configure or Add Another Rule. The Add setting box opens.
- In the Add setting box, take these steps:
- Required: Enter a name or description for the new rule. You can't save the new rule if this field is empty.
- Email messages to affect: Check the Inbound box, the Internal-receiving box, or both.
- Inbound—Incoming messages from external senders are delivered to both the primary and secondary servers.
- Internal-receiving—Incoming messages from internal senders are delivered to both the primary and secondary servers.
- For the above type of messages:
-
Click the dropdown and select Modify message.
- Click the Change the route box.
- Under Change the route, click the dropdown and select the external server you added in Step 1: Add your legacy server in the Admin console where you'll deliver the affected messages.
- Scroll down, and click Show options.
-
- Show Options:
-
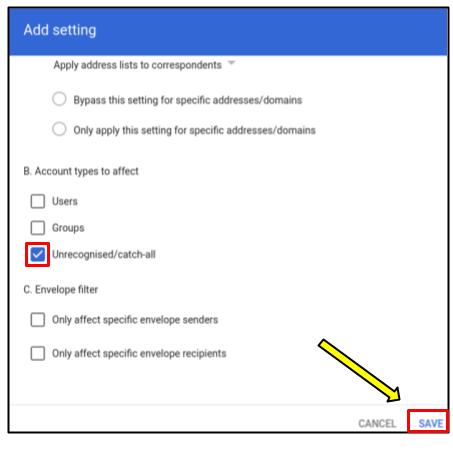
Under Account types to affect, check the Unrecognized/Catch-all box. The Users and Groups boxes should be unchecked.
- (Optional) To apply this setting only to senders or recipients that you specify:
- Under the Envelope filter, check one or both boxes.
- Click the menu and select an option for matching sender and recipient addresses.
- Enter an email address, pattern, or group to match.
- Repeat for all senders and recipients.
-
- At the bottom of the Add setting box, click Save.

Please check the below-supporting article for your further reference:
Deliver email to multiple inboxes with dual delivery - Google Workspace Admin Help
Send email to two email systems with split delivery - Google Workspace Admin Help