You can set up hosted Secure/Multipurpose Internet Mail Extensions (S/MIME) in your Google Workspace account to increase the security of your organization's email.
S/MIME provides enhanced email security through encryption and digital signatures, making it an effective solution for safeguarding your organization against email-based threats such as phishing attacks and malicious software. To utilize S/MIME, both the sender and recipient must have it enabled, which can be configured to ensure all messages are sent or received using S/MIME. Additionally, you can configure S/MIME to enforce certain messages to be sent or received only through S/MIME, thereby providing an added layer of security for your users.
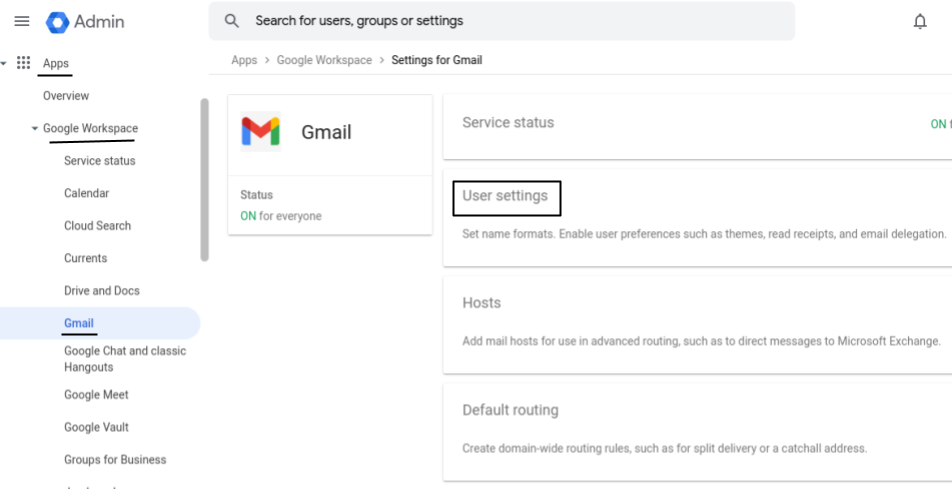
Turn on S/MIME in your Google Admin console:
- Sign in to your Google Admin console using an administrator account.
- In the Admin console, go to Menu >> Apps >> Google Workspace >> Gmail >> User settings.
3. under Organizations, select the domain or organization you want to configure S/MLME.
Important: To configure advanced controls on S/MIME, such as uploading and managing root certificates, it's important to enable SMIME at the top-level organization, which is usually your domain. This ensures that the necessary settings are applied across your entire organization and that S/MIME can function properly with the uploaded root certificates.

4. check and Enable S/MIME encryption for sending and receiving emails box.
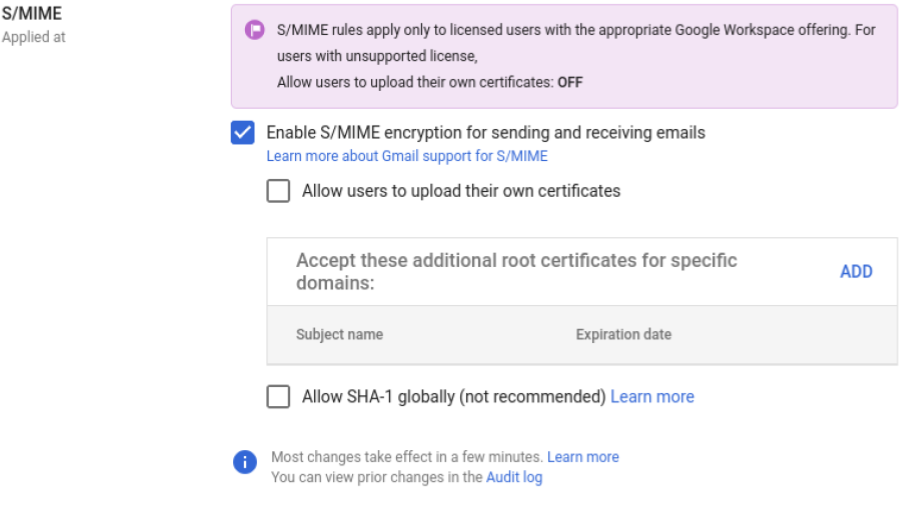
- Next to Accept these additional Root Certificates for specific domains, click Add.
- Click Upload Root Certificate.
- Browse to select the certificate file and click Open. A verification message appears for the certificate, which includes the subject name and expiration date. If there’s a problem with the certificate, an error message appears.
- Under the Encryption level, select the encryption level to use with this certificate.
- Under the Address list, enter at least one domain that will use the root certificate when communicating. Domain names can include wildcards that meet the RFC standard. Separate multiple domains with commas.
- Click Save.
- Repeat for additional certificate chains.
6. Check the Allow SHA-1 globally (not recommended) box only if your domain or organization must use Secure Hash Algorithm 1 (SHA-1).
7. Click Save.
Instruct your users to reload Gmail.
Once you have enabled hosted S/MIME in your Google Admin console, instruct your users to reload Gmail, and upon reloading, a Lock icon will be displayed in the Subject line of email messages. If the message has been encrypted with hosted S/MIME, the Lock icon will appear green.
Upload certificates
To use hosted S/MIME encryption, S/MIME end-user certificates must be uploaded to Gmail. The certificate should meet current cryptographic standards and use the Public-Key Cryptography Standards (PKCS) #12 archive file format.
It is recommended that administrators upload certificates using the Gmail S/MIME API, which can also be utilized to manage tasks such as viewing, deleting, and setting default user keys.
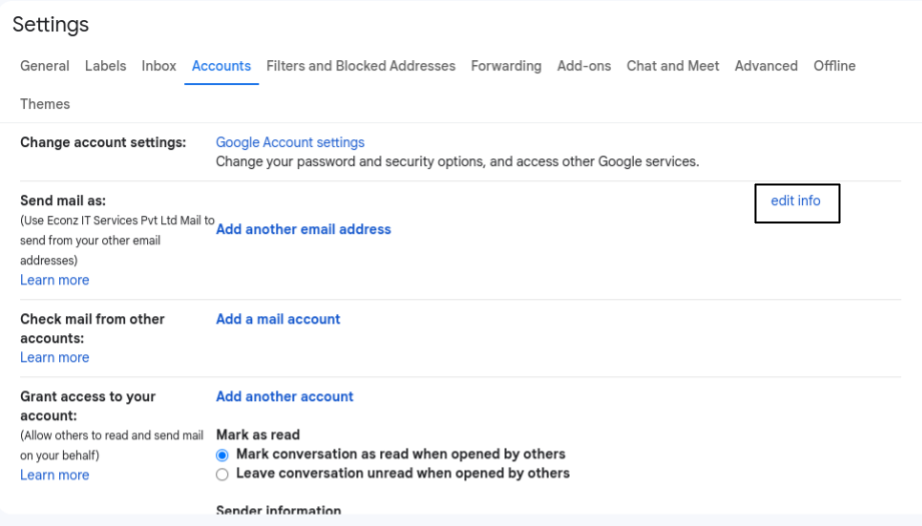
You can also let users upload certificates in their Gmail settings:
- Go to Gmail.
- Choose Settings
>> See all settings.
- Select the Accounts tab.
- Next to Send mail as select Edit info.
Edit the email address and the encryption settings window appears. If you don't have this option, contact your administrator.
- Click Upload a personal certificate.
- Select the certificate and click Open. You'll be prompted to enter a password for the certificate.
- Enter the password and click Add certificate.
Have your users exchange keys
To start exchanging S/MIME messages, your users need to exchange keys with message recipients in one of these ways:
By sending a S/MIME signed message to recipients, the message is digitally signed and contains the user's public key, which can be used by the recipients to encrypt messages they wish to send to the user.
- Ask recipients to send them a message. When they receive the message, it’s signed with S/MIME. The key is automatically stored and available. Going forward, messages sent to the recipient are S/MIME-encrypted.
To override SMIME settings:
- Sign in to your Google Admin console using an administrator account.
- In the Admin console, go to Menu >> Apps >> Google Workspace >> Gmail >> User settings.
- On the left, under Organizations, select the organizational unit you want to configure.
- Scroll to the S/MIME setting, and click to expand it.
The label under the S/MIME setting label will indicate either Inherited from (organization or domain name) or Overridden. - Click Override to save changes to the sub-organization inheriting SMIME settings.
After the sub-organizations settings are saved, Overridden is displayed under the SMIME settings label. A dot also appears next to the overriding sub-organizations in the Organization Unit structure tree on the left.
Note: If your sub-organization has overridden a higher-level organization’s settings, you can use the Inherit button to inherit settings from the higher-level organization.
For more reference please refer to the article