Using Context-Aware Access, you can create granular access control security policies for apps based on attributes such as user identity, location, device security status, and IP address.
You control user access based on their context, such as whether their device complies with your IT policy.
Example Use Cases :
You can use Context-Aware Access when you want to:
- Allow access to apps only from company-issued devices
- Allow access to Drive only if a user storage device is encrypted
- Restrict access to apps from outside the corporate network
You can also combine more than one use case into a policy. For example, you could create an access level that requires app access from devices that are company-owned, encrypted, and meet a minimum operating system version.
Set up endpoint verification and turn on Context-Aware Access
Set up endpoint verification
If you enforce a device policy in an access level, you and your users have to set up endpoint verification. You enable endpoint verification in the Admin console. For instructions, see Turn endpoint verification on or off.
Note: If you enforce a Context-Aware device policy before the user can sign in to Endpoint verification, the user may get access denied even if their device meets the enforced Context-Aware policy. This is because syncing the device attributes through Endpoint verification may take a few seconds. To avoid this, be sure to have users sign into Endpoint verification and refresh their browser page before you enforce a Context-Aware device policy.
Review which devices have endpoint verification
- Go to Menu > Devices > Overview.
- Click Endpoints.
- Click Add a filter.
- Select Management Type > Endpoint Verification.
- Click Apply.
Turn on and turn off Context-Aware Access
You can turn on Context-Aware Access at different times in the rollout process. You can turn it on before creating access levels and assigning them to apps, which means that access levels you assign to apps are enforced immediately.
You can also do initial setup and review (access level creation, access level assignment, endpoint verification) without turning on Context-Aware Access. During this time, access-level assignments aren’t enforced. When the configuration is complete, you can turn on Context-Aware Access.
You can turn off Context-Aware Access if there are user issues, and you want to pause the app while you investigate which policies are creating the issues. After you determine which access level is causing the issues, you can modify the policy or remove it as needed for specific organizational units or groups.
Please find the support article to get further details on the same.
To turn on Context-Aware Access
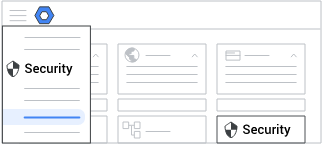
- In the Admin console, go to Menu > Security > Access and data control > Context-Aware Access.
- Verify Context-Aware Access is ON. If not, click Turn On.

Please find the support article to get further details on the same.
Create an access level
Access levels consist of one or more conditions that you define. To access apps, users must meet the conditions. Access-level conditions contain attributes you can select, such as device policy, IP subnet, or another access level.
You can create access levels in 2 different modes, Basic and Advanced. Basic mode provides you with a list of predefined attributes that you can select. If you need to use attributes that are not in the interface, build a custom access level in Advanced mode instead.
Define access levels—Basic mode
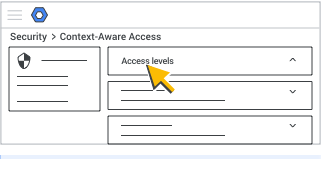
You see a list of defined access levels. Access levels are a shared resource between Google Workspace and Google Cloud, so you might see access levels that you didn’t create in the list. To indicate which team created an access level, consider making the platform part of the access-level name.

The basic mode is selected by default. You’ll define the access level by adding one or more conditions to it. Then define each condition by specifying one or more attributes.
Note: We recommend that you do not use the Google Cloud Platform (GCP) interface to add or modify Context-Aware access levels if you are a Workspace-only customer. If you add or change access levels using a method other than the Context-Aware access interface, this error message may result: Unsupported attributes are being used on Google Workspace, and users can be blocked.
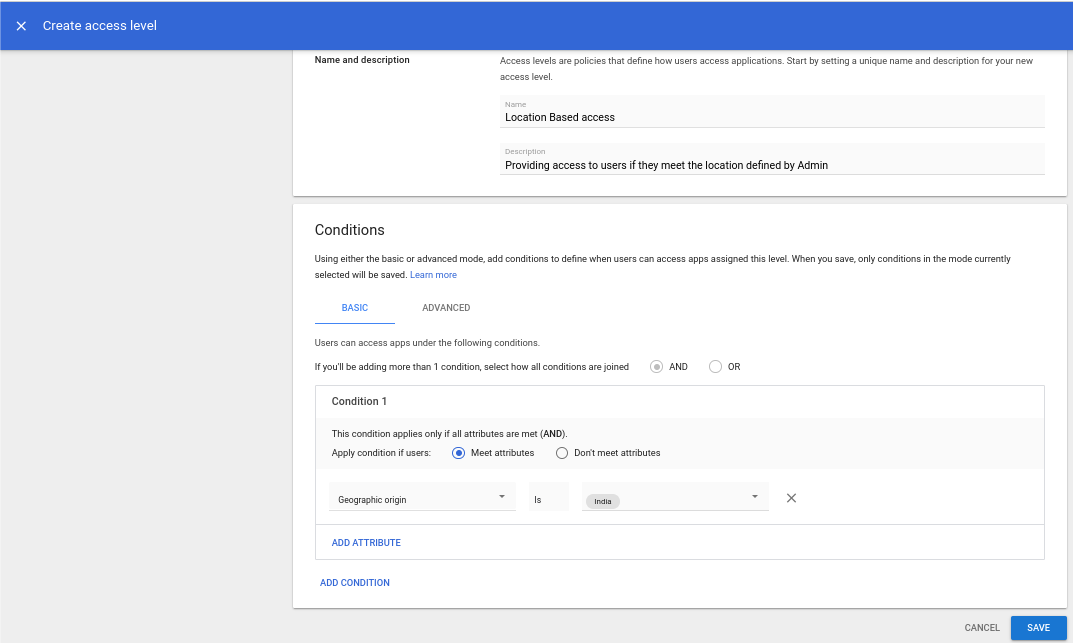
- Add an access level name and optional description.
- For the access level condition you add, specify if the condition applies when users:
- Meet attributes—Users must satisfy all the attributes in the condition.
- Don’t meet attributes—Users don’t meet any of the attributes in the condition. This option specifies the opposite of the condition and is most frequently used for IP subnet attributes. For example, if you specify an IP subnet and “don’t meet,” only users with IP addresses outside of the specified range will match the condition.
- Click Add Attribute to add one or more attributes to the access level condition. The attributes you can add are
- IP subnet—IPv4 or IPv6 address or routing prefix in CIDR block notation.
- Private IP addresses are not supported (including users' home networks).
- Static IP addresses are supported.
- To use a dynamic IP address, you must define a static IP subnet for the access level. If you know the range of the dynamic IP address and the defined static IP address in the access level covers that range, access is granted. Access is denied when the dynamic IP address is not in the defined static IP subnet.
- Geographic origin—Countries/regions where the user is accessing Google Workspace services. Devices with internal IP addresses are not supported because those IP addresses are not globally unique.
- Device policy (only choose the devices policies you need to implement)—
- Admin approval is required (if required, the device must be approved)
- The company-owned device is required
- Screen lock is required
- Device encryption (Not supported, Not encrypted, Encrypted)
- Device OS (users can only access Google Workspace with the operating systems they select. Set a minimum operating system version, or allow any version. Use the format major.minor.patch for the operating system version)—
- macOS
- Windows
- Linux
- Chrome OS
- iOS
- Android
- Access level (must meet the requirements of an existing access level).
- To add another condition to the access level, click Add condition and add attributes to it.
- Indicate the conditions users must meet:
- And—Users must meet the first condition and the added condition.
- Or—Users must meet only one of the conditions.
- When you’ve finished adding access level conditions, save the access level definition by clicking Save. Now you can assign this access level to apps.
Please find the support article to get further details on the same.
Assign Context-Aware access levels
To apply the setting for certain users, put their accounts in an organizational unit (to be set by department) or a configuration group (to be set for users across or within departments).
In the Admin console, go to Menu > Security > Access and data control > Context-Aware Access.
Click Assign, then Assign access levels. You see a list of apps.

On the left, select an organizational unit or group. To apply the setting to everyone, leave the top organizational unit selected. Otherwise, select a child organizational unit or a configuration group.

Find the app you want and on the right, click Assign. You may have to scroll to see the Assign button for the app you want. Also, be sure not to unintentionally assign the access level to the Admin console.

To assign the same access levels to multiple apps at once, check the boxes next to the apps and click Assign at the top of the list.
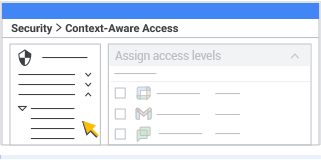
You see a list of all access levels. Access levels are a shared resource between Google Workspace and Google Cloud so you might see access levels you didn’t create in the list.
Select one or more access levels (up to 10) for the app.
Users are granted access to the app when they meet the conditions specified in just one of the access levels you select (it’s a logical OR of the access levels in the list). If you want users to meet the conditions in more than one access level (a logical AND of access levels), create an access level that contains multiple access levels. If you want to assign more than 10 access levels for an app, you can use nested access levels to do so.
Note for mobile apps: For integrated Gmail (which contains Gmail, Google Chat, and Google Meet), you can grant or deny access to all 3 services at once. To set up integrated Gmail, you turned on Meet and Chat for Gmail. For details on integrated Gmail, go to Set up integrated Gmail for your organization. If Google Chat and Google Meet are implemented as separate apps (not as part of integrated Gmail), you need to grant or deny access to those apps separately.
To apply the access levels to users of desktop, Android, and iOS apps (as well as web apps), check the Apply to Google desktop and mobile apps box. This option applies to Native apps only.
We recommend that you check this box whenever you assign access levels to apps and always deploy Endpoint verification from a security standpoint.
The following table summarizes the behavior based on whether you check the Apply to Google desktop and mobile apps box and whether you deploy Endpoint verification. The rows in the bold underscored text display the recommended settings.
Key terms for this table:
- Access level applied: Access is granted based on the access levels you set up in the Context-Aware Access configuration.
- Access allowed: Context-Aware Access is not applied and all access is allowed.
- Access blocked: Access is blocked because Context-Aware Access isn't configured, or you don't have Endpoint verification turned on.
Click Save. If a user meets the conditions in at least one of the selected access levels, the user can access the app. The access level name is displayed in the assigned access levels list next to the app.
Please find the support article to get further details on the same.