As a Groups administrator, you can create groups for departments, teams, or other sets of users in your organization.
Where can I do this? You can create a group and add members in your Google Admin Console or Google Groups.
You can use groups for collaboration or to set up a feature or service configuration.
Feature or service configuration
(The group must be created in the Admin console, not using Google Groups.)
In addition, you can use a group to:
Create a group in the Admin Console or Google Groups so your users can:
- Send an email to all group members with a single address
- Invite group members to a meeting
- Share content with members, including documents, sites, videos, and calendars
Option 1: Use the Admin console to create a group
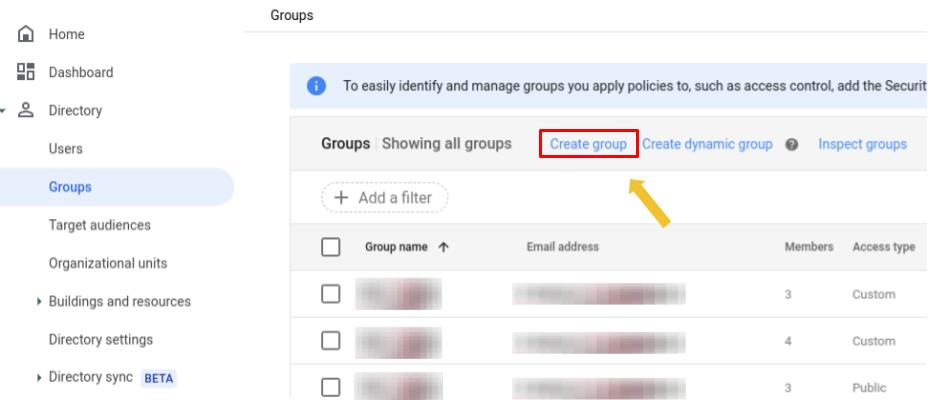
- In the Admin console, go to Menu > Directory > Groups.
- At the top, click Create group.
- Enter the details and click Next.

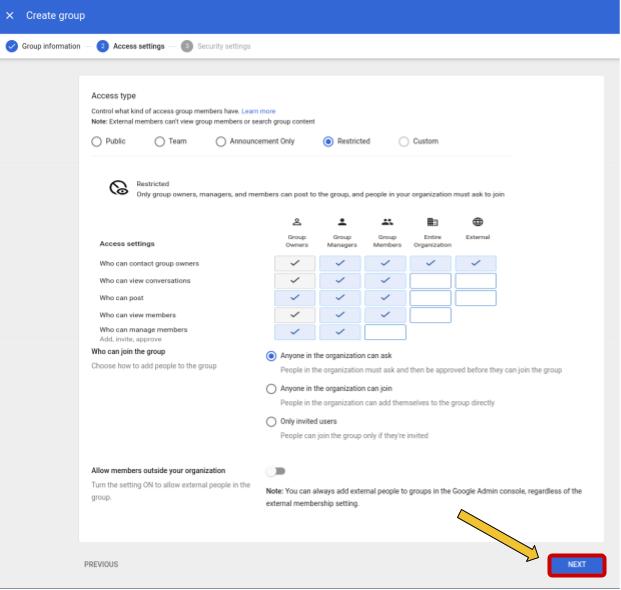
- Choose a group access type—Public, Team, Announcement only, or Restricted.
Each type includes predefined permissions for group owners, managers, and members, as well as whether the group is open to the entire organization or people outside the organization. - (Optional) To customize the access settings, click the table cells to select or deselect an option. Customizing any options changes the group access type to Custom.
Below are the description of the Access settings,- Who can contact group owners—Specifies who can directly email group owners.
- Who can view conversations—Specifies who can view conversations posted in the group.
- Who can post—Specifies who can publish messages to the group.
- Who can view members—Specifies who can view group members.
- Who can join the group—Specifies who can add people, invite people, and approve requests for the group.
- Select who can join the group from the below options,
- Anyone in the organization can ask—People in the organization must ask and then be approved before they can join the group.
- Anyone in the organization can join—People in the organization can add themselves to the group directly.
- Only invited users—People can join the group only if they’re invited.
- Turn Allow members outside your organization to set off to prevent external people from being added to the group. Or, turn it on to allow external people in the group.
- Click Next.
- (Optional) To restrict who can be members of this group, select Restrict membership and add your query conditions. Learn more about restricting group membership.
- Click Create Group.
->Continue with the next steps to add group members.
Add just a few members
- Click Add members.

- Then, in the next screen at top click Add members.
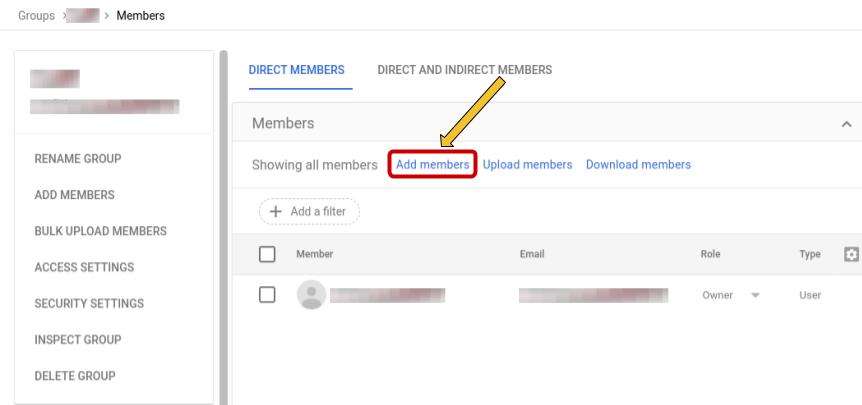
- For users or groups, enter the first few characters of the email address and select it.
- Repeat the previous steps as needed.
- Click Add To Group.
All new members get the Member role and the All email subscription.
Add many members at once
To add a lot of members, try one of these methods:
- Select members from your Users list
- Upload members from a CSV file
- Add other groups to the group
- Add all your organization’s users to a group
Option 2: Use Google Groups to create a group
- Sign in to Google Groups.
- At the top, click Create group.
- Enter the details of the Group (Group Name, Group email, and Group description) and click Next.
- Choose privacy settings,
Below are the descriptions of Privacy settings,
|
Option |
Description |
|
Who can search for group |
Choose an option for who can find the group by searching for the group’s name, email address, or conversations:
|
|
Who can join group |
Choose an option:
|
|
Who can view conversations |
Choose who can see conversations posted to the group. |
|
Who can post |
Choose who can send messages to the group email address. |
|
Who can view members |
Choose who can view the group's member list. |
- Then, click Next.

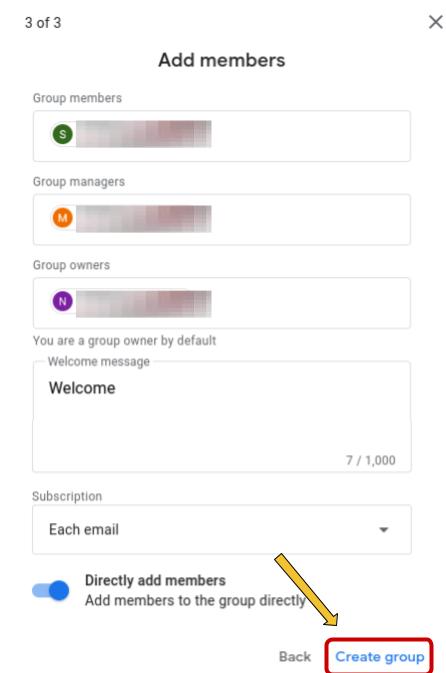
- Enter the following details as per your requirement to Add members,
|
Options |
Description |
|
Group members |
Enter the names or email addresses of people you want to add and assign the member role. By default, group members have basic permissions. Depending on the organization and group settings, these permissions might include viewing and posting to conversations and viewing members. |
|
Group managers |
Enter the names or email addresses of people you want to add and assign the manager role. By default, managers can do everything that owners can do except:
|
|
Group owners |
Enter the names or email addresses of people you want to add and assign the owner role. By default, members with the owner role have all permissions for a group. Only an owner can:
Only group owners and managers can change a group’s settings. An administrator can remove some owner permissions. |
|
Welcome message |
Enter a message emailed to people when they're added to the group without being invited. This option is available only if Directly add members is on. |
|
Invitation message |
Enter a message sent to people in their email invitation to join the group. Invitees click a link in the invitation to join. This option is available only if Directly add members is off. |
|
Subscription |
Set preferences for receiving emails from the group. Options include:
To receive abridged summaries or digests of a group’s messages, you must turn on conversation history for the group. |
|
Directly add members |
Set whether to add members to the group directly, or invite members to join. If you turn Directly add members:
|
- Click Create group.
After you create a group
- It can take up to 24 hours for a new group to appear in your Groups directory, which all users can access.
- Wait a few minutes for your new group to become active before sending a message to it. Otherwise, you might get a notification that your message couldn't be delivered.
Please check the below-supporting article for your further reference:
Create a group in your organization - Google Workspace Admin Help