You can choose to forward all of your new messages to another email address, or only forward certain types of messages.
Turn automatic forwarding on or off
Note: When your new messages are forwarded, messages from spam won't be included.
Turn on automatic forwarding
- On your computer, open Gmail using the account you want to forward messages from. You can only forward messages for a single Gmail address, and not an email group or alias.
- In the top right, click Settings
> See all settings.
- Click the Forwarding and POP/IMAP tab.
- In the "Forwarding" section, click Add a forwarding address.
- Enter the email address you want to forward messages to.

- Click Next > Proceed > OK.
- A verification message will be sent to that address. Click the verification link in that message.
- Go back to the settings page for the Gmail account you want to forward messages from and refresh your browser.
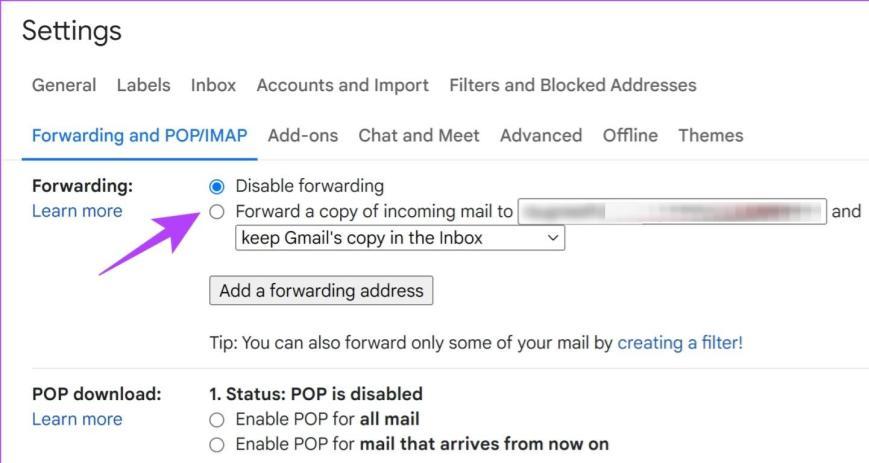
- Click the Forwarding and POP/IMAP tab.
- In the "Forwarding" section, select Forward a copy of incoming mail to.
- Choose what you want to happen with the Gmail copy of your emails. We recommend Keep Gmail's copy in the Inbox.
- At the bottom of the page, click Save Changes.
Turn off automatic forwarding
- On your computer, open Gmail using the account you want to stop forwarding messages from.
- In the top right, click Settings
See all settings.
- Click the Forwarding and POP/IMAP tab.
- In the "Forwarding" section, click Disable forwarding.
- At the bottom, click Save Changes.
To forward certain kinds of messages:
If you only want to forward certain kinds of messages to another account, create a filter for these messages.
When you're setting up your filter, you can choose what email address to forward these messages to.
If you don't see an email address to forward messages to, follow the steps above to turn on forwarding.
Steps to create a filter
- Open Gmail.
- Click on the Settings icon and select ‘See all settings’.
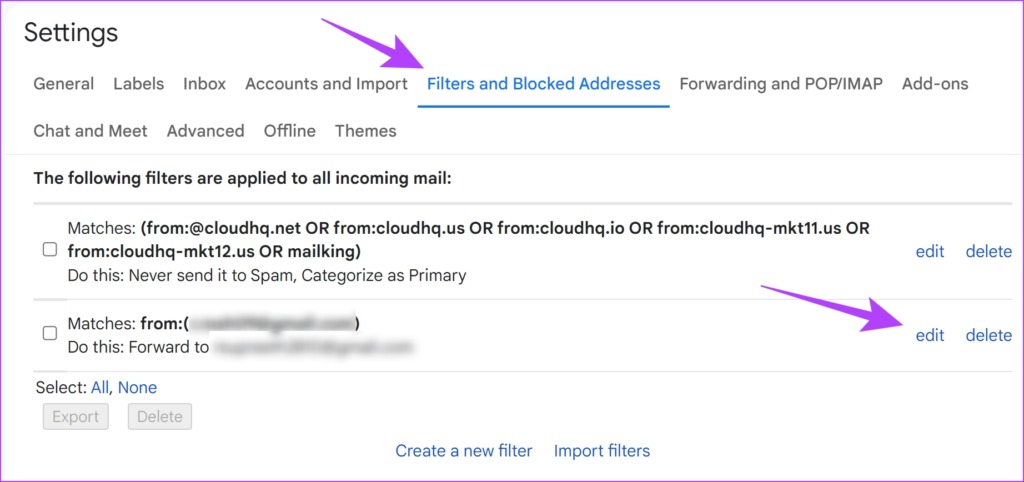
- Open the ‘Filters and Blocked Addresses’ tab.
- Click on ‘Create a new filter’.
You will now get a list of filter criteria and parameters.

- Fill in the fields to create a filter. Here’s what you need to know about the filter.
-> To Address: Emails sent to a specific address, which is entered in the filter.
-> Subject: Emails with the subject matching the entry in the filter.
-> Has the words: Emails with words matching the entry made in the filter.
-> Doesn’t have: Emails that do not have the words matching the entry made in the filter.
Based on the details that you enter, the emails matching the criteria will be forwarded.
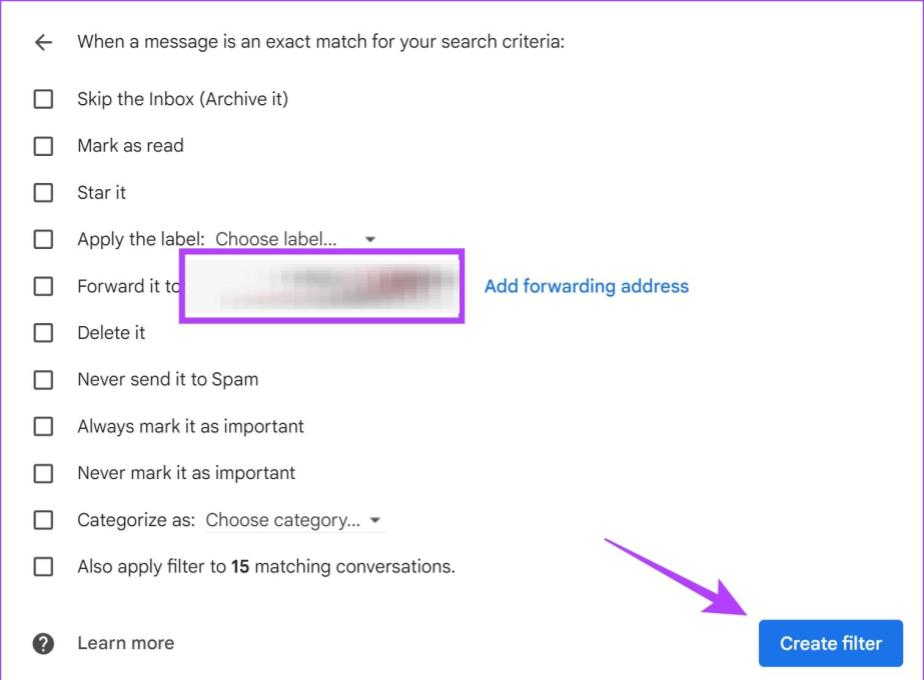
- Once you fill in the details, click on Create Filter.

- Now, check the box for ‘Forward it to’ and choose an address from the dropdown box next to it to which you want the email to be forwarded.
- Once you select the email address, click on Create Filter.
- If you want to edit the settings and criteria in the filter, you can visit the ‘Filters and Blocked Addresses’ tab, and click on the edit button next to the filter you created.
Note: When you create a filter to forward messages, only new messages will be affected. Additionally, when someone replies to a message you've filtered, the reply will only be filtered if it meets the same search criteria.
Forward to multiple accounts
You can only automatically forward all your messages to one account.
To forward emails to multiple accounts, use the steps above in "Only forward certain kinds of messages" to create filters to forward messages to different accounts.
Please check the below-supporting article for your further reference:
https://support.google.com/mail/answer/10957?hl=en#zippy=