In an organization's admin console, it's often necessary to assign different admin roles to different users based on their responsibilities and the level of access needed. Admin roles can range from basic roles like a help desk admin to more advanced roles like a super admin with full control over the organization's settings and data.
It's important to assign admin roles carefully and thoughtfully to ensure that users only have access to the tools and data they need to do their job. This helps maintain the security and privacy of the organization's data and reduces the risk of unauthorized access or misuse of sensitive information.
Steps to assign admin role for one user:
- Sign in to the admin console for your organization.
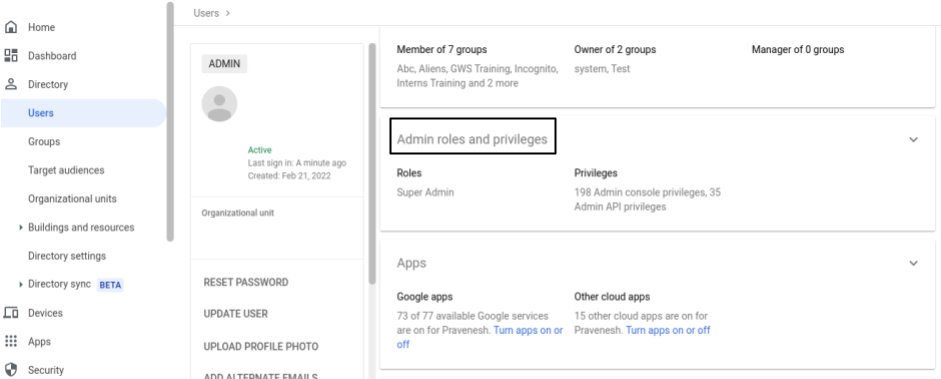
3. Find the user to whom you want to assign an admin role and click on their name.
4. On the user details page, Select “Admin roles and privileges” > Roles.
5. Choose the admin role that you want to assign to the user from the list of available roles.
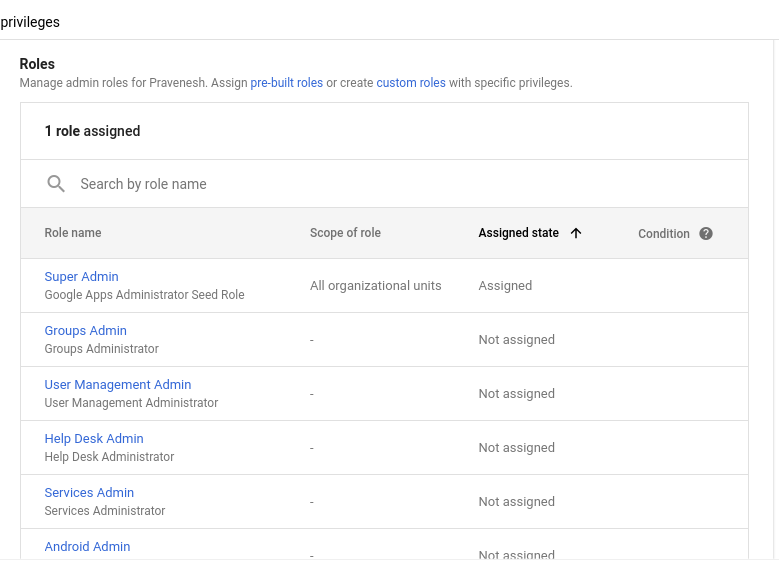
6. Click on the "Assign" button to confirm the admin role to the user.
7. Click Save.
Steps to assign admin role for several users:
- Sign in to the admin console for your organization.
- In the Admin console, go to Menu > Account > Admin roles
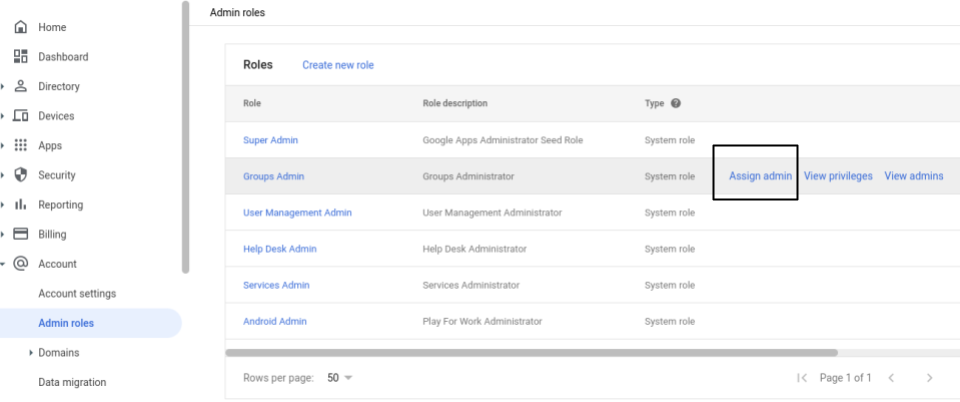
3. Point to the role that you want to assign and on the right, click Assign admin
4. Click on “Assign User”.
Note: You can assign a role to up to 20 users and groups at a time.
Note: To restrict the admin's role to a specific organizational unit, next to All organizational units, click Edit , select the organizational units, and click Done.
If you don’t see Edit , you cannot apply the role to organizational units.
For further reference, check this article.