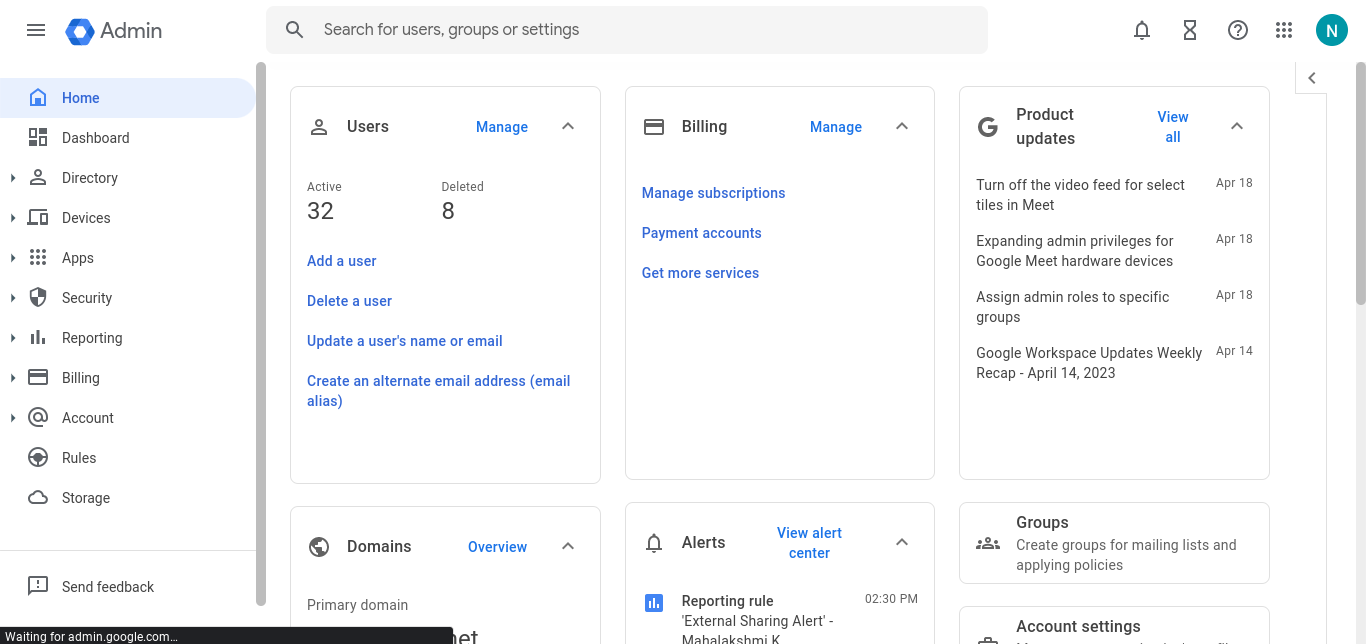
As an administrator, you can keep an inventory of the computers and mobile devices your company owns. The inventory lets you review details such as device type and who the device is assigned to. When you list a device in your company-owned inventory, it's automatically approved to access your organization's data. You can get an email that lists inactive devices.
Before you begin
- OS requirements by device type
Endpoints :
- Apple Mac, Chrome OS with Chrome Enterprise Upgrade, Linux, or Microsoft Windows
- Endpoint verification
- Supported editions for this feature: Frontline; Business Starter, Business Standard and Business Plus; Enterprise; Education Fundamentals, Education Standard, Teaching and Learning Upgrade, and Education Plus; G Suite Basic and G Suite Business; Essentials; Cloud Identity Free and Cloud Identity Premium.
Android :
- Android 6.0 Marshmallow and later
- Advanced mobile management
- Supported editions for this feature: Business Plus; Enterprise; Education Standard and Education Plus; G Suite Business; Cloud Identity Premium. Compare your edition
- Note: If your organization deploys Android devices with zero-touch enrollment or a user assigns ownership to the company during device setup, the devices aren't listed in the company-owned inventory unless you add them.
iPhone and iPad:
- iOS 11 and later
- Advanced mobile management
- Supported editions for this feature: Enterprise; Education Standard and Education Plus; Cloud Identity Premium. Compare your edition
- Assigning devices
- When you add a device to the inventory, you don't assign the device to a user as part of the process. The device is assigned when the user adds their work account to the device.
- You can add a device to the company-owned inventory even if you already gave it to a user. (Android users might get a prompt to factory reset and re-enroll the device.)
- If a computer has only fundamental management, the serial number of the device is not reported and the Admin console doesn’t display the assigned user.
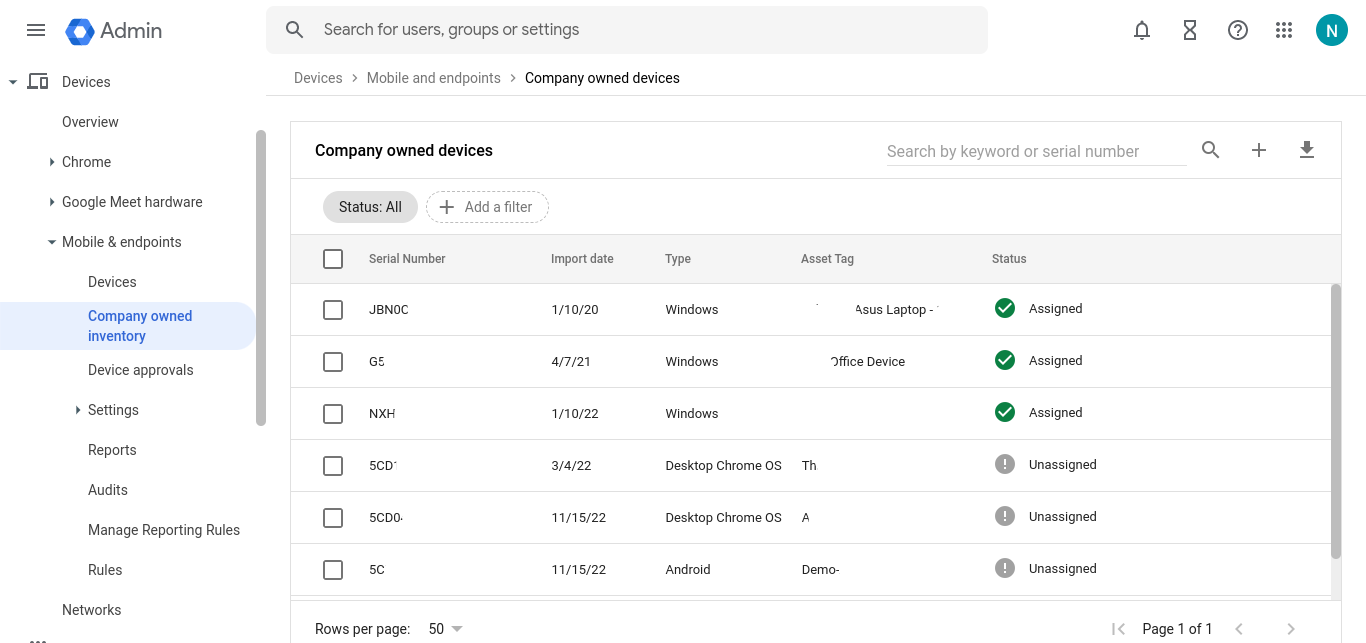
Add devices to the inventory:
To add devices to the inventory, you import the serial numbers of devices in the Google Admin console.
Step 1: In your Google Admin console (at admin.google.com)...
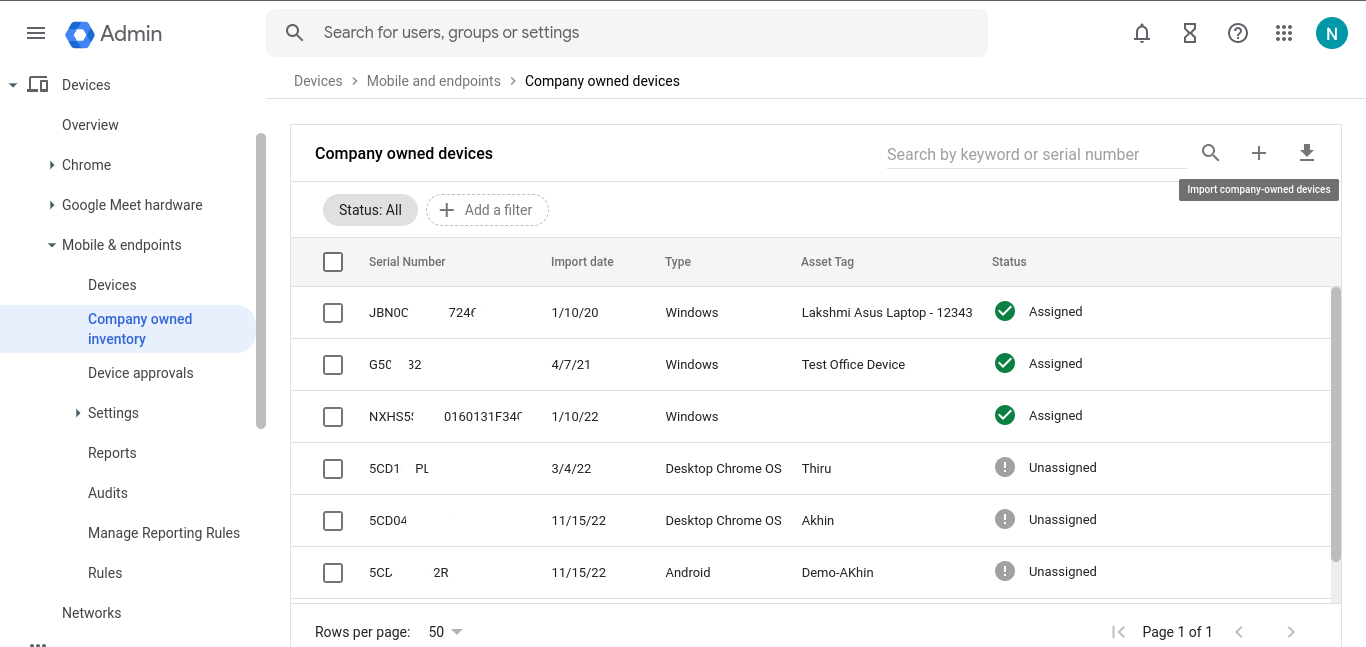
Step 2: Go to Menu -> Devices > Mobile and endpoints > Company-owned inventory.
Step 3: At the top, click Import company-owned devices.
Step 4: Select the type of device you want to import and click Download import template.
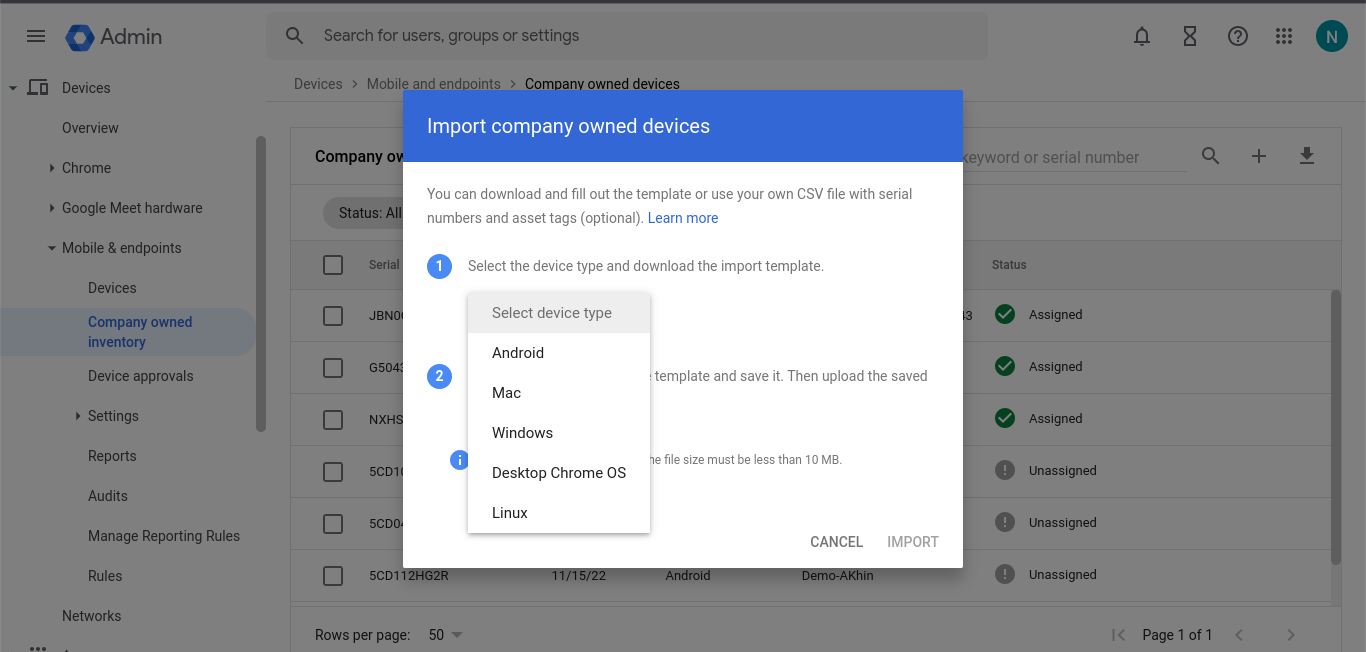
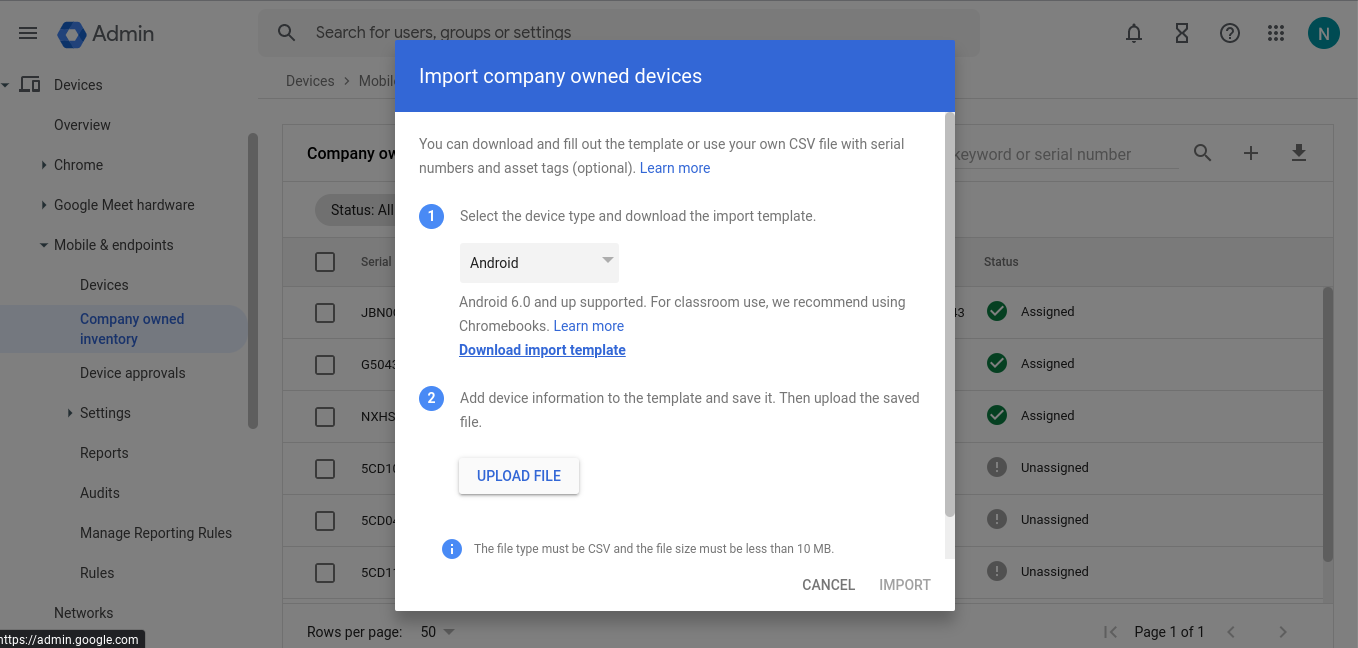
Step 5: Enter a maximum of 100,000 entries per file, starting a new line for each device. (To add more devices, upload more than one file.)
- Open the template file.
- Enter the serial numbers and, optionally, asset tags of one or more devices. (Asset tags are strings that your company can use to track devices.)
Example:
Serial Number (mandatory), Asset Tag
R84534UIF824-123-234,W123
U83452BDU424-232-694,W442
If you don't include asset tags, then format the file correctly by making one of the following edits: - In the file header, remove, Asset Tag. (Be sure to remove the comma.)
- Include a comma after each serial number.
- Save the file.
Step 6: Go back to the Admin console and click Upload File.
Step 7: Select the CSV file with the device serial numbers and click Import. If the file has an error, an error message reports the type of problem.
- To upload a corrected file, correct the errors then click Upload New File.
- If the error is applied only to some rows, you can still import the other rows. Click Continue. The values in the rows with errors aren't imported.
Step 8: When the import completes, you get an email with a summary of the results. You can also download a log of the upload that lists the row number, values, and upload status.
Please find the Google article for your reference.